Adding your own Python module
Adding your own Python module to CodeProject.AI
Recall from Adding new modules to CodeProject.AI that there are 3 main tasks for adding a module (in development mode) to CodeProject.AI server
- Create an install script (usually short) to setup the pre-requisites (download models, install necessary runtimes)
- Write an adapter that handles communocation between the module and the CodeProject.AI server,
- Provide a
modulesettings.jsonfile that describes the module and provides instruction to CodeProject.AI on how to launch the module.
But first let's start slightly before this
Choosing a module to add
We want a module that will drop in easily, is self contained, and which will work within the current ecosystem of Python and / or .NET on Windows, macOS and Ubuntu.
The rembg module is a simple but fun AI module that takes any phote containing a subject and removes the background from the image. It runs under Python 3.9 or above. It exposes a simple API, works offline, and is fully self-contained.
Creating an installer script. Or two.
the rembg module comprises the following
- The python code
- The python 3.9 interpreter
- Some Python packages
- The AI models
To ensure these are all in place within the development environment we need to create an install.bat
install script in the folder containing our project.
For Windows (install.bat)
This script will be called automatically from the global setup.bat script
:: Download the models and store in /models
call "%sdkScriptsPath%\utils.bat" GetFromServer "rembg-models.zip" "models" "Downloading Background Remover models..."
Obviously there's not a lot this script needs to do other than download the models for the module.
Behind the scenes the installer will sniff the modulesettings file, not that it uses Python 3.9, and create a Virtual Environment for the module using this version of Python. The script will also see a requirements.txt file in the folder, and so once the install script, above, has been run, the installer will install the Python packages listed in the requirements file.
When writing install scripts you have the following variables and methods at your disposal:
Variables available:
| Variable | Description |
|---|---|
| absoluteAppRootDir | the root path of the app (def: C:\Program Files\CodeProject\AI) |
| sdkScriptsPath | the path to the installation utility scripts (%rootPath%\SDK\Scripts) |
| runtimesPath | the path to the installed runtimes ($rootPath/src/runtimes) |
| downloadPath | the path to where downloads will be stored ($sdkScriptsPath/downloads) |
| modulesPath | the path to all the AI modules ($rootPath/src/modules) |
| moduleDir | the name of the directory containing this module (def: name of current dir) |
| os | "windows" for this script |
| architecture | "x86_64" or "arm64" |
| platform | "windows" for this script |
| verbosity | quiet, info or loud. Use this to determines the noise level of output. |
| forceOverwrite | if true then ensure you force a re-download and re-copy of downloads. GetFromServer will honour this value. Do it yourself for DownloadAndExtract |
Methods available (call by call %sdkScriptsPath%\utils.bat <method>)
| Method | Description |
|---|---|
| Write text [foreground [background]] | Writes text without a linefeed using the given colors (eg call %sdkScriptsPath%\utils.bat WriteLine "Hi" "green") |
| WriteLine text [foreground [background]] | Writes text with a linefeed using the given colors |
| GetFromServer filename moduleAssetDir message | Downloads a file from the server and places it in the directory specified within the module's folder
|
| DownloadAndExtract storageUrl filename downloadPath dirNameToSave message | Downloads a file from a remote server, unpacks it and stores it in the given folder
|
For Linux and macOS (install.sh)
The script is essentially the same as the Windows version:
The variables and methods available in Linux / macOS are the same as in Windows, with the exception that in Linux/macOS the methods are camelCased.
Writing the adapter
To create an adapter we'll need to define the payload that we expect to get from the server, the queue we wish the server to setup for us, and (ultimately) the routes we wish to use as endpoints for the server in order to allow clients to call our module. This information is stored in the modulesettings.json file.
The most important components of this will be the queue name and the payload format.
The payload will be an image and a boolean value that determines whether alpha matting will be used. Alpha matting is useful when dealing with images with softer edges. The return package will be the modified image. We're passing information back via Json, so we'll be base64 encoding the image.
Creating the module and adapter
First, we create a folder under the modules directory (/src/modules) and copy over the code for the module. In this case we'll store the code in /src/modules/BackgroundRemover. For convenience we'll create a Python project for those using Visual Studio (working in VS Code is just as simple).
The rembg module has one main method we need to call, named remove. We will ask
CodeProject.AI to place requests for our module in the removebackground_queue queue (defined in the
modulesettings.json file below), and each time we see a request in that queue, we'll transform the
data into a form we can pass to the remove method. The results will then be converted to Json
and placed back on the queue, ultimately ending up back with the client that made the original call
to the server.
We'll use the src/SDK/Python/module_runner.py module to help handle the details.
We'll create an adapter in rembg_adapter.py as follows.
# Import our general libraries
import sys
import time

# Import the CodeProject.AI SDK. This will add to the PATH var for future imports
sys.path.append("../../SDK/Python")
from request_data import RequestData
from module_runner import ModuleRunner
from common import JSON

from PIL import Image

# Import the method of the module we're wrapping
from rembg.bg import remove

class rembg_adapter(ModuleRunner):

    def initialise(self) -> None:
       pass

    async def process(self, data: RequestData) -> JSON:
        try:
            img: Image             = data.get_image(0)
            use_alphamatting: bool = data.get_value("use_alphamatting", "false") == "true"

            start_time = time.perf_counter()
            (processed_img, inferenceTime) = remove(img, use_alphamatting)

            return {
                "success": True,
                "imageBase64": data.encode_image(processed_img),
                "processMs" : int((time.perf_counter() - start_time) * 1000),
                "inferenceMs" : inferenceTime
            }

        except Exception as ex:
            await self.report_error_async(ex, __file__)
            return {"success": False, "error": "unable to process the image"}

    def shutdown(self) -> None:
        pass

if __name__ == "__main__":
    rembg_adapter().start_loop()
We also make one small (optional) change to the remove method in the rembg project that allows us
to report on inference time. This isn't needed: it just is a nice touch
In /rembg/bg.py we wrap the masks = session.predict line with some timing:
    start_time = time.perf_counter()
    masks = session.predict(img)
    inference_time: int = int((time.perf_counter() - start_time) * 1000)
This is the only code we've added. The rembg module has been copied and pasted as-is, and we're creating a child class of the ModuleRunner class in the CodeProject.AI SDK module module_runner.py. Nothing else (code-wise) needs to be added.
The modulesettings.json file
We need to tell client applications how they will call our module, and the CodeProject.AI server what
route it needs to watch. This route can be whatever we like, so let's choose the
route /v1/image/removebackground.
Our modulesettings.json file also allows us to define environment variables that are local to the process. Here, we'll let rembg know where the model file that we downloaded in the setup script is stored.
Since this is a Python module we'll also set the runtime as Python3.9, and ask it to call our adapter file to start the process.
{
  "Modules": {
    "BackgroundRemover": {
      "Name": "Background Remover",
      "Version": "1.1",

      // Publishing info
      "Description": "Automatically removes the background from a picture",
      "Platforms": [ "windows", "macos", "macos-arm64" ], // issues with numpy on linux
      "License": "SSPL",
      "LicenseUrl": "https://www.mongodb.com/licensing/server-side-public-license",

      // Launch instructions
      "AutoStart": true,
      "FilePath": "rembg_adapter.py",
      "Runtime": "python3.9",
      "RuntimeLocation": "Local", // Can be Local or Shared

      // Which server version is compatible with each version of this module.
      "ModuleReleases": [
        { "ModuleVersion": "1.0", "ServerVersionRange": [ "1.0", "2.2.0" ], "ReleaseDate": "2022-11-01" },
        { "ModuleVersion": "1.1", "ServerVersionRange": [ "2.2.0", "" ], "ReleaseDate": "2022-11-01" },
      ],

      // These are all optional. Defaults are usually fine
      "SupportGPU": false,
      "AcceleratorDeviceName": null,  // = default
      "Parallelism": 1,               // 0 = Default (number of CPUs - 1)
      "HalfPrecision": "enable",      // "Force", "Enable", "Disable": whether to force on, allow, or disable half-precision ops
      "PostStartPauseSecs": 0,        // 1 if using GPU, 0 for CPU

      "Queue": "removebackground_queue",    // default is lower(module_id_) + "_queue"

      "EnvironmentVariables": {
        "U2NET_HOME": "%CURRENT_MODULE_PATH%/models" // where to store the models
      },

      "RouteMaps": [
         // ... (explained below)
      ]
  }
}
The EnvironmentVariables section defines key/value pairs that will be used to set environment variables that may be reqiured by the module. In this case, the path to the AI model files. This is a value specific to, and defined by, the rembg module.
CURRENT_MODULE_PATH is a macro that will expand to the location of the directory containing the current module.
In this case /src/modules/BackgroundRemover.
The BackgroundRemover section contains the information on launching the module.
The name and description are self-explanatry. The FilePath is the path to the file to be
executed, relative to the MODULES_PATH directory. AutoStart sets whether or not this module will
be launched at runtime.
Runtime defines what runtime will launch the file. We currently support dotnet (.NET), python37 (python 3.7) and python39 (Python 3.9). If omitted, the CodeProject.AI Server will attempt to guess based on the FilePath.
The Platforms array contains an entry for each platform on which the service can run. Currently Windows, Linux, Linux-Arm64, macOS, and macOS-Arm64 are supported.
Routmaps
The file also defines the API routes for the module under the RouteMaps section
{
  "Modules": {
    "ModulesConfig": {
      "BackgroundRemoval": {
         "Name": "Background Removal",
         "Version": "1.0",
         "Description": "Removes backgrounds from images.",

         ...

         "RouteMaps": [
           {
             "Name": "Background Removal",
             "Path": "image/removebackground",
             "Method": "POST",
             "Command": "removebackground",
             "Description": "Removes the background from images.",
             "Inputs": [ ... ],
             "Outputs": [...]
           }
         ]
       }
     }
   }
}
Path is the API path, in this case localhost:32168/v1/image/removebackground. Remember that this was what we chose (arbitrarily) as our API. It can be anything as long as it isn't currently in use.
Method is the HTTP method to use. In our case GET.
Command is the method in the API controller that will be called, in this case
removebackground. Queue is the name of the queue in the API server that will manage
the request for this service.
Description, Inputs and Outputs are purely documentation at this stage.
The client that will call our new module
A simple Javascript test harness can be used to demonstrate the new module
  // Assume we have a HTML INPUT type=file control with ID=fileChooser
  var formData = new FormData();
  formData.append('image', fileChooser.files[0]);
  formData.append("use_alphamatting", 'false');

  var url = 'http://localhost:32168/v1/image/removebackground';

  fetch(url, { method: "POST", body: formData})
        .then(response => {
            if (response.ok) {
                response.json().then(data => {
                    // img is an IMG tag that will display the result
                    img.src = "data:image/png;base64," + data.imageBase64;
                })
            }
        })
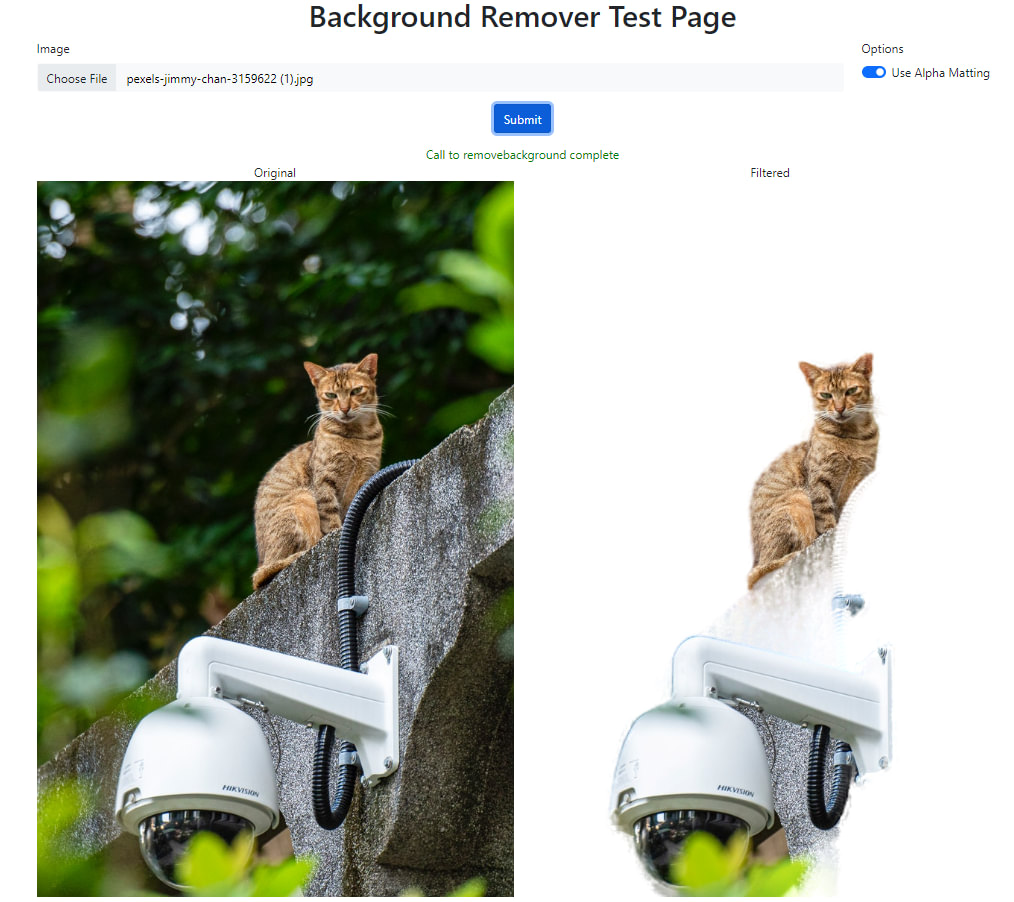
test.html that implements this, providing the UI to collect the
information and display the results.
Install and test
At this point we have a module, an install script and a test client. Let's give it a run
-
Ensure you have the latest CodeProject.AI repo downloaded. That has all the code we've talked about above already in place
-
Run the dev install script. This will see your new script and then run it to ensure Python 3.9 is installed and setup, and that the required Python modules are installed.
-
Launch the server by starting a new debug session in Visual Studio or VS Code.
-
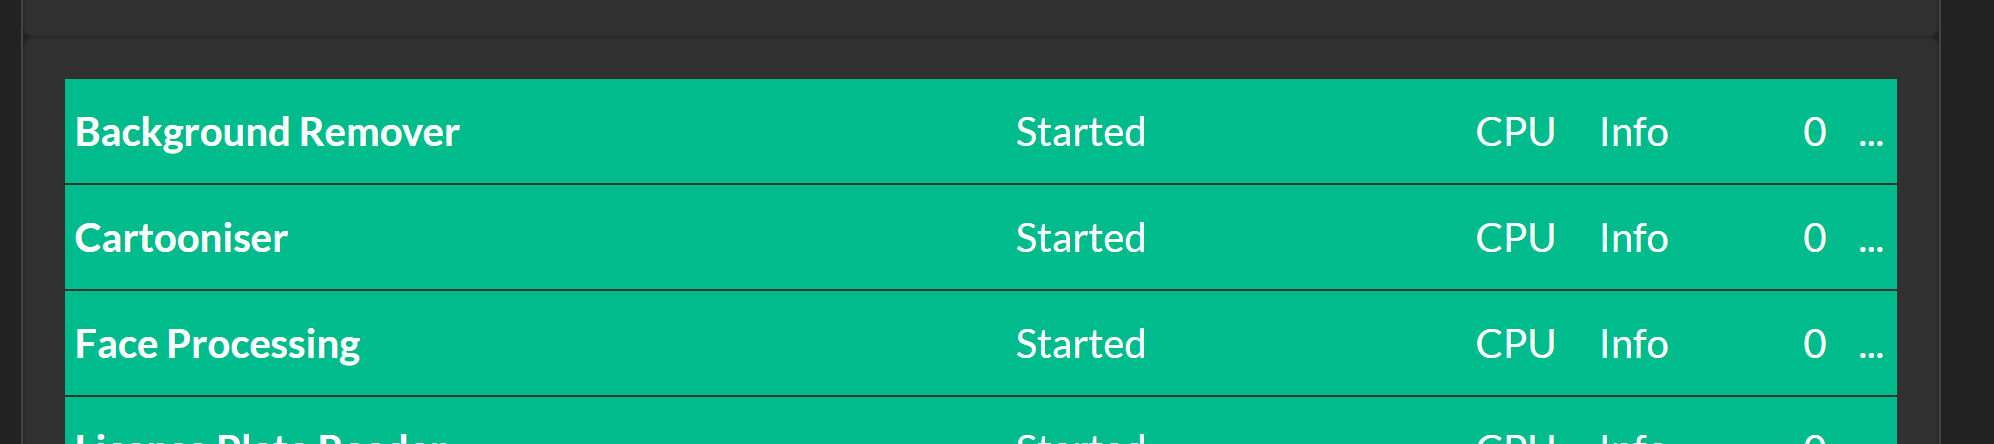
In Debug, the CodeProject.AI Dashboard is automatically launched when run. After the server starts all the backend Modules, including the Background Removal module, the Dashboard will display the modules it knows about.
-
Launch the
test.htmlfile in a browser, choose a file and click "Submit" button. The results should be shown.
What next?
That's up to you. We've demonstrated a very simple AI module that removes the background from an image. The main work was
- Ensuring you have the assets (eg models) available on a server so they can be downloaded
- Updating the install script so your assets can be downloaded and moved into place, as well as ensuring you have the necessary runtime and libraries installed
- Dropping in your module's code and writing an adapter so it can talk to the CodeProject.AI Server
- Writing a modulesettings file that describes the API for your module
- Testing! Always the fun part.
The possibilities on what you can add are almost limitless. Our goal is to enable you, as a developer, to add your own AI modules easily, and in turn get the benefit of modules that others have added. Mix and match, play with different sets of trained modules, experiment with settings and see where you can take this.
It's about learning and it's about having some fun. Go for it.